Tag Archives: TARDIS

TARDIS sides finishing touches

Watching an old episode, I suddenly noticed that each of the 3 sides of the TARDIS bears an architrave feature running down the middle of the panel, mirroring the door-stop architrave on the doors.

Bum! A quick visit to hardware for what I hope is my last purchase of timber for this project, and away. I agonised over whether to make the thickness 8mm so as to match the first step of the horizontal skirting under the lightbox, or to step it to bring it in level with the third ‘step’.

At this late stage, I decided to do the least amount of mucking around, so went for the flat design. I noticed in random viewings of the Baker (2), Pertwee and Hartnell Tardises that both cases are true, so it was a coin toss anyway!

TARDIS base structure

Something I had not thought considered in my construction up until now was the construction of the base. It occurred to me as I watched an old episode or other that there does seem to be quite a lip on the floor. I think I initially thought a flat surface so that K9 (I don’t have one (yet!)) might roll in or out without much hassle.

So some plans and sketchwork later, I decided on a structural floor with a kickboard and plinth that matched the tv prop. I also took the opportunity to add some wheels, each with a rated load of 100kg so that should be sufficient to support and shift the structure with relative ease.

TARDIS on its side

With the help of teacher Leon & some especially muscly apprentices, we tilted the TARDIS onto its side to that I could attend to its base. I’m constructing an extra platform for the floor to rest on (currently a single thick piece of ply) which doesn’t have much structural strength.

I’ll also add some wheels to make it easy to move around (should I desire). I figure different driveway locations should keep the neighbours guessing.

TARDIS final corner post details added

I had to glue & clamp in pairs & unfortunately there were only enough clamps to do one pair at a time, so four weeks late, I have completed gluing the corner details. Chris the builder teacher wandered in with his pedal powered broken collar bone (ouch!) and commented that the corner details added an improved dimension to the build.

Watching an old episode of Jon Pertwee’s I noticed an added middle divider on all sides of the box using the same motif as the door stopper, so off to hardware again to get some more timer!

After this week’s gluing is dried, I’ll get some help to tip the whole structure on its side so that I can build the floor structure.

TARDIS corners

A flaw in my design was leaving out a detail on the timber corner posts which had been bugging me. In order to achieve the ‘correct’ exterior dimensions and not build something that would collapse the ground under it, I decided on the whole to use relatively thin timber (12-18mm hardwood)  for the various aspects of construction.

Various details such as above the windows, around the light boxes, and the corner posts have a very much stepped design giving the prop a 3 dimensional depth. By the time I’d completed the corner posts, I’d noticed that I’d omitted an extra ‘step’ and thought that I’d add these back in by creating some shaped timber slats to straddle the height of the corner posts.

This is also a slight design variation as the timber detail highlights the light box (as used by the Ecclestone & Tennant doctors) but is not seen on other props where the lightbox simply sits on top of the corner posts.

TARDIS windows

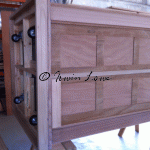
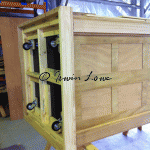
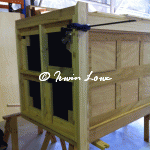
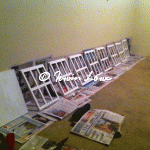
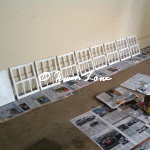
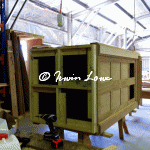
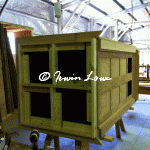
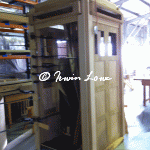
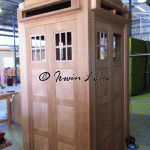
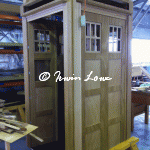
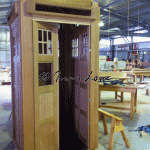
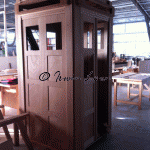
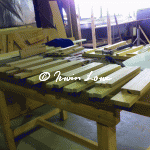
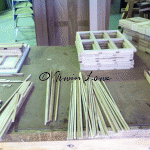
A lot of activity over the past few weeks to do with the window frames for the TARDIS. The design I envisaged used slats to make up the actual frames, then to have the window panes inserted into these. The better way of doing this from a consistency point of view was to make each slat exactly the same dimensions so that assembly and replication was the easy part (as opposed to easily making them up and then spending ages making them fit).

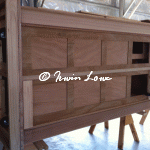
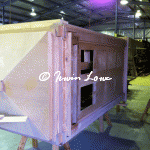
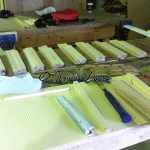
Three days of jig making, panel saw cutting, and drum sanding later, I had 56x millimetre identical sticks of timber with half laps ready to fit into each other. Glazing now pressed on the mind and we decided to go with rebating trenches into the backside of the timber and to bead the glass in as the very last step so that any timber movement did not damage the 3mm thin glass.

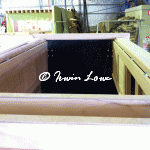
I obtained the glass at Essendon Glass which was a very simple process. Googling various TARDIS constructors would have you believe that the exact glass type is difficult & expensive to procure. The bobbly glass (to my eye anyways) looked very similar to translucent bathroom glass, so that’s what I bought. The bottom left and right panes of each window (in various incarnations) is a slightly different design giving a “T” shaed appearance which I don’t mind.

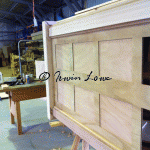
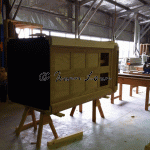
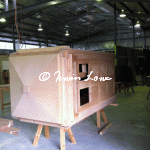
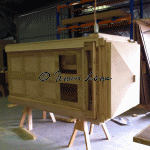
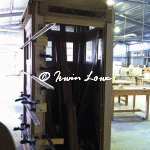
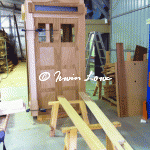
For final installation, I’ll trim the holes in the TARDIS frame made all those years ago from sandwiched ply so that each window fits. I also need a method of attachment. The window frames are slightly recessed into the frame and since I don’t have many millimetres to play with, I’ll sit the entire frame in a bit by means of some slats attached to the back of the window.