A component of my course this year is to create something with curved surfaces using solid timber. To that end, my cabinet doors will be of curved design. I have created a multi-sheet MDF panel with blackwood veneers. Continue reading Curvy Jig
Tag Archives: woodwork
Bee Garden
There completes the edging formwork. Now for some bees.
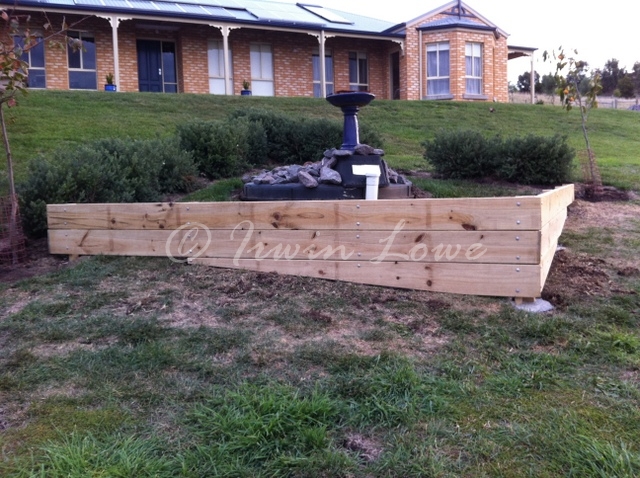
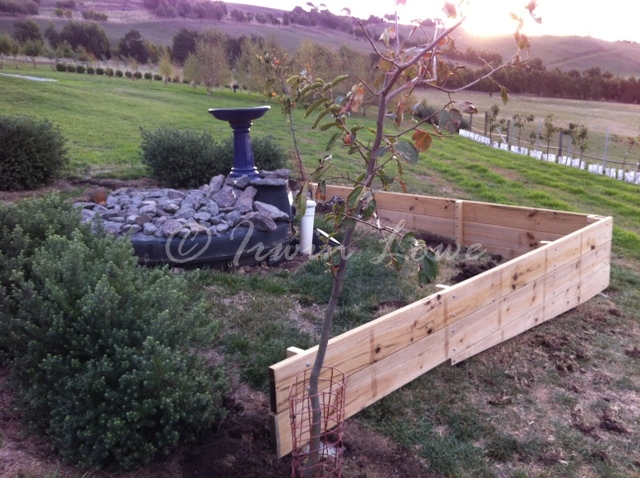
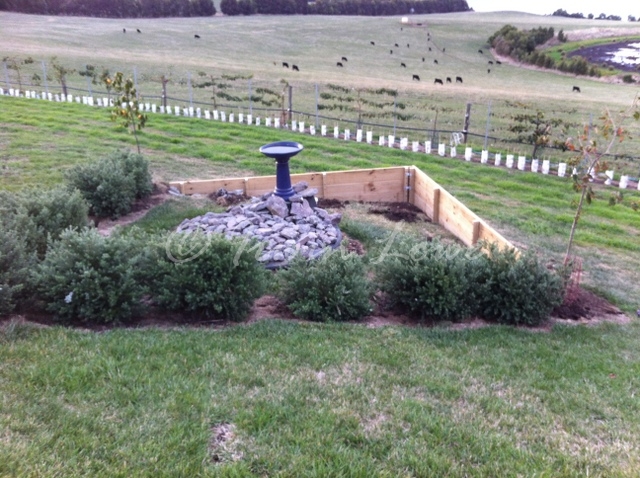
Bee garden
Anna wants a bee garden around the biolytix. In preparation for the eventual gazebo I’ll put there and bbq deck I’ll put elsewhere, I thought some planks of timber sounded pretty easy.
The more I thought about it though, the more I thought about how to do it properly. Cement in the posts, bolt the rails, use spirit level to make things straight… It’s amazing how 90 degrees is not what you thought it was…


Leigh Jig
I have the serious impression that there is a great conspiracy out there and our lives are all just a joke for some uber being’s amusement. After a bit of research, I decided upon the Leigh Superjig in the 18 inch width from Carbatec. Essentially an ‘easy’ way to do some half blind drawer dovetails and some finger joins for the carcasses. Dowelling is a bit inelegant for a 3rd year student.
I bought the set of router bits and noted that the Leigh bits had an unusual 8mm shank. A bit more research revealed that I’d need an adaptor for the Leigh e-bush which meant that I’d need to define which router I’d use. Happy with Makita (what we use at TAFE- they seem bulletproof in the face of the ‘chisel tossing idiots’ as my sister-in-law calls them), I decided to assess their range.
The lightest model the RP0900X1 (check it out, it’s probably still wrong) seemed to fit the bill perfectly as it is advertised as being an 8mm router. Great, thinks I, no collet adaptors needed. the fewer widgets, the less chance of things going wrong.
Bzzzpt! Thank you for playing, next contestant please!
I lost half a day trying to make my 8mm bits fit in the 8mm router. Finally out of exasperation, I pulled my ruler out and measure the 2 collect adaptors. 6.4mm and 9.5mm. Waitaminute! What happened to 8mm? I lost the rest of the day hitting the hardware stores of Warrnambool to be told that no such thing exists. And so I checked Makita’s website again. Then I converted 3/8″ only to discover that it isn’t 8mm!
Kudos to Makita Australia, because a few unimpressed phone calls later, a chap called Matt organised an 8mm collet adaptor to be freighted to me gratis (for the advertised 8mm router I bought under false pretenses, I might add).
In the meantime expecting Easter to waylay my collet, I decided to venture out to Carbatech to grab a 1/4 inch straight bit so that if all else failed, I’d at least be able to rout something! I asked for the long shank 8mm straight bit and by the merest chance the short shanked one happened to be on display. Long story short (pun), the long shank is actually shorter than the short shank. As I wanted a long cutter, I bought the short one because it was longer.
If my head could shake any more it would explode!


Blackwood shelves timber dressing
It astonishes me how tasks scheduled for shed time expand to fill and exceed normal time. perhaps some dimensional instability bleeding out from the TARDIS? The thing about making something well is that it takes time. Changing the task to involve labor saving devices (power tools and jigs) only gives the illusion of saved time for what it actually does is shift 90% of your effort from doing to preparing.
Thus my whole day is spent preparing, making sure that all my planks are the same width and thickness. This is something I learnt during the TARDIS window construction because you really want all components identical (or near as) so that future machining, jigging & fitting can be performed in single actions.


Blackwood shelves
My new project includes curves. I neglected to pass muster for a curvy construction last year as the TARDIS didn’t really have any in it. Just like my second year organic chemistry exam where I knew the molecular structure of all the vitamins except that the examiners didn’t ask it, so too I think I strove too high with the TARDIS…
So, I sourced some blackwood from Smiths Sawmill in Naringal and spent the last couple of classes dressing it up. It is magnificent timber and if you’d asked me before I knew, I’d have said that any grey timber was probably only fit for firewood. But trim away a bit, square it up on the buzzer, make it parallel on the thicknesser and then smooth it through the drum sander and my gosh the results!
I had to glue up some smaller planks to make wider ones for shelves. the start of my curvy project looks a little square right now…

TARDIS done!
I could spend a bit of time tinkering, but I’m going to call it a day. There’s still some considerations as to location and some other displays but in the meantime here’s some arty shots.

TARDIS- St John’s logo
In my head, I couldn’t really conceive when I started of a point when the TARDIS would be done. Now however, my fortuitous forgetting of the St John’s logo when I had the other signs made up has lent me the signal for completion. I was tossing up whether to actually include it or not but since the design is (mostly) based on the 1963 pilot prop, St John’s logo it had to be.
And so, the crowning moment.

TARDIS Interior
Here’s some final pics of the TARDIS interior. The lighting strips come up quite well and there is a surprising amount of space inside.
TARDIS: Light em up!
The end of time approaches! I had to change my TAFE day due to other commitments and so was quizzed by a teacher as to why I was there a day early. I responded that I was actually here on the correct day but that I’d travelled back in time a day.
Boom. Tish.
The lighting is killing me. I’d finished the soldering last week (no pics as nothing new to show) and discovered that my 24v transformer wasn’t supplying the juice to run 100 Xmas buds as well as the window and sign lights.
Some snipping and re-soldering later showed that my wiring was correct but I didn’t have enough power. On closer inspection (bringing in my trusty multimeter), the Xmas lights ran off a 24vac transformer supplying 12vdc to each string (2 strings of 50 for sparkly patterns) and supplying 600mA which explained the non starter.
Brushing up my high school electronics, I decided for the time and effort it would take (and I am keen to get onto the next project) to abandon the coordinated single string of window sign and lantern lights and to run them separately off their own transformers.
Bright lights! I’m happy that the LED lighting is clearly visible in the bright light of day.
I left it wired up and running to test and then had a chat to teacher Pete about my next project. He asked if the TARDIS was supposed to be flashing to which I answered ‘not deliberately’. I’m channelling Jon Pertwee here with the wires and the flashing and the smoke…
The 24vdc 1.25a regulated power supply I’d sourced from Jaycar turned out to not be supplying enough power for the string of 25 led strips (bright for a while and then flash flash bzzpt and a very hot transformer) so have sourced a higher rated supply.
Will try the higher rated supply next week and see what happens. Meanwhile, have (hopefully) sourced a heap of blackwood for the next project.